Halloween Ghost SVG 3D Shadowbox: A Guide to Flawless Papercraft Assembly
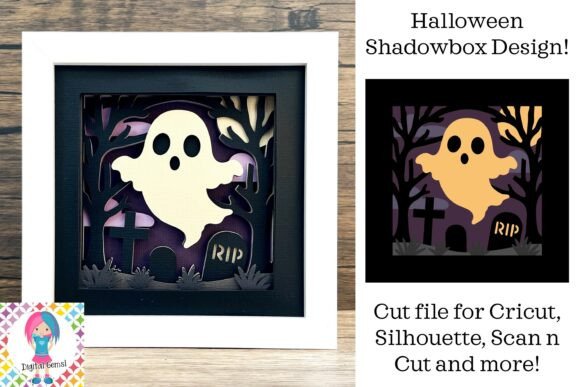
There is a distinct satisfaction in transforming flat sheets of cardstock into a dimensional scene that seems to float within its frame. The Halloween Ghost SVG 3D Shadowbox has become a staple for crafters looking to add depth and whimsy to their seasonal décor. Unlike traditional two-dimensional prints, these layered designs utilize parallax effects to create an illusion of distance, making the friendly ghost appear as though it is truly drifting through a moonlit graveyard. However, the difference between a professional-looking display and a messy, flattened project often comes down to understanding the nuances of layering, material selection, and assembly technique.
Many enthusiasts dive into this hobby with enthusiasm but overlook critical details that compromise the final result. By addressing common pitfalls early, you can ensure your spooky décor looks polished and intentional rather than accidental.
Understanding the Mechanics of Layered Depth
Before cutting your first sheet of paper, it is vital to understand how a Ghost Halloween Shadow Box SVG functions. These files are not merely decorative; they are engineering diagrams for light and shadow. Each layer represents a specific plane of depth. The background layer usually contains the sky or distant elements, while subsequent layers introduce mid-ground features like eerie trees and tombstones. The foreground typically holds the primary subject—in this case, the cute floating ghost.
A frequent misunderstanding among beginners is assuming that more layers automatically equal better quality. In reality, excessive layering without adequate spacing can cause the design to look cluttered and dark. The goal is balance. When you assemble the pieces using foam dots or glue, you are creating physical space between the layers. This space allows light to filter through, casting soft shadows that enhance the three-dimensional effect. If the layers are too close together, the shadows disappear, and the piece loses its magic.
Common Material Mistakes and How to Avoid Them
The choice of material is perhaps the most significant factor in the success of your project. Many crafters attempt to use standard printer paper or lightweight scrapbook paper to save money. This is a critical error. Lightweight paper lacks the structural integrity to hold its shape when suspended or glued at multiple points. Over time, gravity will cause the layers to sag, ruining the clean lines of the tombstones and trees.
Recommendation: Always use cardstock with a weight of at least 216gsm. This thickness provides the necessary rigidity to maintain the architectural integrity of the shadow box. It also ensures that the cut edges remain crisp and do not fray during handling. If you find 216gsm difficult to cut on your machine, ensure your blade is sharp and adjust your pressure settings accordingly, but do not compromise on weight for the sake of ease.
Another overlooked detail is the color palette. While black and orange are traditional, they can absorb too much light, making the interior of the box look muddy. Consider using deep purples, midnight blues, or muted grays for the background layers. These colors provide contrast without sacrificing visibility, allowing the white or pale green ghost to pop against the darker backdrop.
Precision in Cutting and Weeding
Even the best Halloween Ghost SVG 3D Shadowbox file will fail if the cutting process is rushed. Intricate designs, such as the branches of eerie trees or the details on tombstones, require patience. A common mistake is tearing the paper during the weeding process. This happens when the cut lines are not fully severed or when the paper is pulled at the wrong angle.
To avoid this, perform a test cut on a small scrap of your chosen cardstock before committing to the full design. Check that the blade cuts through the material cleanly without cutting into the mat. When weeding, use a fine-point tool and work from the center of the design outward. If a piece refuses to lift, do not force it. Re-cut the area if necessary. Clean edges are essential for a professional finish; ragged edges distract the eye and break the illusion of depth.
Assembly Techniques for Maximum Impact
Assembly is where many projects fall short. Using liquid glue alone is often insufficient for creating true depth. While glue is excellent for securing the outer edges of the frame, it does not provide the standoff distance needed for the internal layers. This is where foam dots become indispensable.
Best Practice: Use double-sided foam tape or pre-cut foam dots for each layer. Vary the thickness of the foam if possible. For example, use thicker foam for the middle layers to push them forward, and thinner foam for the background to keep it recessed. This variation enhances the parallax effect. Ensure that the foam dots are placed strategically near the edges and around any heavy elements to prevent warping.
Additionally, pay attention to alignment. It is easy to shift a layer slightly to the left or right during assembly. To prevent this, lightly pencil mark registration points on the back of each layer or use a lightbox to see through the layers as you stack them. A misaligned ghost can make the entire composition feel off-balance.
Choosing the Right Frame
The frame is not just a border; it is the container that completes the illusion. A standard picture frame will crush your hard work. You must use a shadow box frame with sufficient depth. Measure the total thickness of your assembled layers, including the foam dots, and add a few millimeters for clearance. If the glass touches the front layer, it will flatten the design and potentially smudge the ink or damage the paper.
Consider the lighting as well. Some crafters install small LED strip lights inside the frame to illuminate the scene from within. If you choose this route, ensure the battery pack is accessible and that the wires are hidden behind the layers. Natural light can also be effective, so consider where the finished piece will hang in your home.
Final Checks Before Display
Before sealing your creation, take a moment to inspect it under different lighting conditions. Look for dust particles, stray glue strands, or uneven edges. A quick blast of compressed air can remove debris that settled during assembly. Ensure that all layers are securely attached and that there is no bowing in the cardstock.
Creating a Ghost Halloween Shadow Box SVG Layered 3D Papercraft is a rewarding experience that blends technical precision with artistic expression. By selecting the right materials, respecting the mechanics of depth, and assembling with care, you transform simple digital files into hauntingly charming handmade decorations. Whether you are crafting for your own home or creating gifts for friends, these attention-to-detail practices will elevate your work from amateur to artisan. Embrace the process, take your time, and enjoy the spooky fun of bringing your ghostly scene to life.